What you’re really removing (and why older shades fight back)
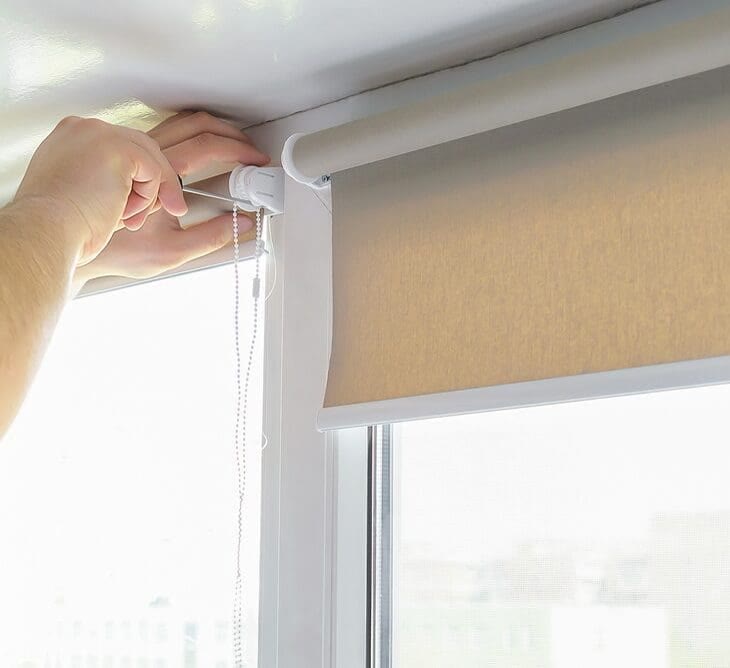
Most roller shades are held by two brackets (left and right). One side usually has a spring-loaded pin, and the other side has a clutch or idle pin. Older shades can be stubborn because:
- Paint has sealed the bracket edges to trim or drywall.
- Screws are stripped or painted over.
- Anchors were used in drywall and are now bonded in place.
- The headrail is slightly bowed, binding the pin.
The goal is to remove the shade with controlled force so you don’t rip paper facing off drywall or crack painted trim.
If you’re replacing your old shades, World Wide Shades makes the next step easy: price and customize in design your shade, request materials at order swatches, or call (844) 674-2716 for measuring and ordering help.
Tools you’ll want (and what to avoid)
Have these ready before you start:
- #2 Phillips screwdriver (manual is safer than a drill for final turns)
- Small flathead screwdriver (for spring pin release)
- Utility knife (to score paint lines)
- Painter’s tape (protect trim)
- Putty knife or 5-in-1 tool (gently prying)
- Pliers (pulling anchors)
- Spackle, sanding sponge (150–220 grit), and primer for repairs
Avoid using a claw hammer directly on trim—use a putty knife as a buffer if you must pry.
Safety first: quick checklist
- Wear safety glasses (old brackets can snap loose).
- If you’re on a ladder, keep your belt buckle between the rails (don’t overreach).
- For wide shades, have a second person help—one holds the tube while the other releases the pin.
Step-by-step: remove the shade from the brackets
Lowering removes tension and gives you control. If the shade is stuck, see roller-shade-stuck-wont-go-up-troubleshooting before forcing it.
Look for:
- A small pin that compresses inward
- A slotted bracket where a flathead can push the pin
If you can’t tell, gently push the tube left/right—one side will “give” slightly.
Hold the shade tube close to the bracket you’re releasing. The tube is heavier than it looks, especially for blackout fabrics.
- Push the pin inward with a flathead screwdriver.
- While the pin is compressed, swing that end of the tube down and out.
- Then slide the other end out of the clutch/idle bracket.
If the pin won’t compress, paint may be binding it. Score the paint line (next section) and try again.
Step-by-step: remove brackets without tearing drywall
This is the best “no-damage” trick:
- Run a utility knife along the bracket edges.
- Cut through the paint film so the bracket can separate cleanly.
If brackets are mounted to wood trim:
- Apply painter’s tape around the bracket.
- Insert a thin putty knife behind your pry point.
Painted-over screw heads strip easily.
- Pick paint out of the screw head with a utility knife tip.
- Press firmly and turn slowly.
- If using a drill, start in reverse to “break” paint adhesion, then go forward.
If the bracket is anchored into drywall:
- If it’s a plastic expansion anchor: back the screw out, then pull the anchor with pliers.
- If it’s a toggle bolt: remove the screw and let the toggle fall behind the wall.
- If the anchor spins: push it slightly into the wall, then patch the hole.
If you’re upgrading to new custom shades and want stronger mounting, see inside-mount-vs-outside-mount-shades and how-to-measure-windows-for-roller-shades.
What to do if the screws are stripped or seized
Place a wide rubber band between the screwdriver and screw head to increase friction.
A manual driver gives better feel than a drill and reduces cam-out.
If the screw head is proud enough, grip it with locking pliers and turn.
Use a bit slightly larger than the screw shank and drill until the head pops off. Then remove the bracket and back out the remaining shank with pliers.
If this sounds like a hassle, you’re not alone—many homeowners replace old shades during remodels. World Wide Shades can help you plan an upgrade and choose hardware that installs cleanly. Start at design your shade or contact us at contact us.
Patch and touch-up: making the window look new again
Once the brackets are off, you’ll typically have 2–6 holes.
- Lightly sand torn paper edges.
- Apply a thin layer of spackle.
- Sand smooth after drying.
- Prime before paint (prevents flashing).
- Fill holes with wood filler.
- Sand smooth.
- Spot prime and repaint.
If you’re ordering new shades, patching now helps your new install look crisp. For installation planning, read how to install roller shades and roller-shades-installation-cost-diy-vs-professional.
Replace immediately: measuring and ordering the right next shade
After removal, the window is a blank slate. Here’s the fastest path to a better result:
- Decide inside vs. outside mount (see inside-mount-vs-outside-mount-shades).
- Measure width in three spots (top/middle/bottom) and use the smallest for inside mount.
- Measure height left/middle/right and use the longest.
World Wide Shades makes ordering simple:
- Build your shade at design your shade
- Compare colors and textures at order swatches
- Get expert help at contact us or call (844) 674-2716
When to remove vs. leave in place
Before you touch anything, decide whether removal is actually the goal. If the roll tube is bent, the clutch has failed, or the fabric is torn, replacement is inevitable — but if the shade is simply outdated, sometimes a re-fabric or a hardware upgrade is smarter. World Wide Shades can quote a re-fabric on the same tube in many cases, saving install labor and reducing waste. For a full replacement comparison, see our custom roller shades vs Home Depot breakdown.
Removal makes sense when you plan to change the mount type (inside → outside, or vice versa), when new hardware is included with a replacement order, or when the old brackets are corroded, painted-over multiple times, or missing screws. It also makes sense before a paint or trim job, when leaving hardware in place would force you to cut paint lines and risk chipping later.
Tools and materials checklist
You do not need specialty tools, but a good kit prevents surface damage. At minimum, keep the following on hand:
- A #2 Phillips and a flathead screwdriver for legacy brackets
- A utility knife to score painted bracket seams before prying
- A 1.5-inch putty knife and a plastic pry tool to protect drywall and trim
- Painter's tape to mark bracket locations before removal
- Spackle, sandpaper, and touch-up paint for any drywall repair
- A cordless drill with a magnetic bit holder for stripped screws
- A helper for shades longer than 60 inches — dropping a tube from height is how brackets tear drywall
If you plan to reinstall in the same window, take pictures of the bracket positions, pin spacing, and any shims before removal. Those measurements save hours when installing new shades — and if you plan to upgrade, the team at World Wide Shades or (844) 674-2716 can spec the correct bracket depth based on your window trim.
Step-by-step removal sequence
Work from top to bottom and always remove the tube before the brackets. Roll the shade fully up so the fabric is protected inside the tube. Then:
- Lift and rotate the tube off the mounting pins. Most shades release with a slight upward push, then a tilt away from the spring-side bracket.
- Support the full length of the tube as it comes free — heavier blackout shades can bend if held at only one end.
- Set the tube down flat, not on end, to prevent clutch damage.
- Score painted bracket seams with a utility knife before unscrewing.
- Remove screws slowly using downward pressure to avoid stripping. If a screw spins in place, tap it lightly with a hammer to reseat.
- Pry the bracket gently with a putty knife, working the plastic pry tool between the bracket and the wall or trim.
- Patch anchor holes immediately so drywall dust does not spread across your floor.
If you plan to reorder from World Wide Shades, keep one old bracket for reference. Slight differences in pin spacing and clutch style matter, and photographing the bracket makes it easy to match. For inside mounts, also measure the depth from the front of the window jamb to the glass — most cassettes need at least 2.5 inches of clearance, and heavier tubes may need 3.
Repairing wall damage after removal
Even a careful removal often leaves small holes and paint scuffs. For drywall anchor holes larger than a quarter inch, push a small piece of paper towel or a self-adhesive drywall patch behind the hole before spackling. Apply spackle with a putty knife, feather the edges, then sand lightly once fully dry. Two thin coats usually beat one thick coat.
For trim damage — most often paint chips along the top edge — a small artist brush and matched trim paint blend in better than a roller. If you are painting the whole room anyway, do the trim touch-up last so any spackle dust does not embed in the wet paint.
If you upgraded your window treatments and want to hide the old holes permanently, an outside-mount replacement covers up to about an inch of wall damage above the trim. That is one reason many customers switch mount styles when World Wide Shades at (844) 674-2716 helps them redesign a room.
Common removal mistakes to avoid
- Prying with a metal knife directly on painted trim — always tape the tip or use plastic.
- Removing brackets before the tube — the tube provides leverage that keeps the bracket flat while you unscrew.
- Reusing old wall anchors — old plastic anchors are usually cracked and will spin under load. Replace them.
- Forgetting to check for hidden wiring — motorized shades sometimes have low-voltage runs behind the trim. Never yank wires; disconnect at the transformer first.
- Discarding old hardware before ordering replacements — the pin style and clutch orientation are the fastest way to match a new shade. When you order from World Wide Shades, you can attach photos of the old hardware to the quote request.
If you want an installer to handle the removal, patching, and reinstall as a single visit, our white-glove installation service is designed for exactly that. Get a walkthrough quote at /builder or call (844) 674-2716.
FAQ: removing old roller shades
Yes. Removing the tube first reduces weight and prevents the bracket from tearing drywall if it suddenly releases.
Paint often creates a “seal” around the bracket. Score the paint line with a utility knife, then gently pry using a putty knife to protect the surface.
Some cassettes clip onto mounting brackets. Look for a small lip along the top edge; gently pry the cassette off the clips before removing screws. If you’re upgrading, see roller shade valance options.
Sometimes, but it’s rarely ideal because pin spacing, bracket depth, and clutch type vary by brand. For best alignment and warranty fit, use the hardware that ships with your new shade.
Inside mount looks built-in and needs enough depth; outside mount gives better light coverage and is more forgiving for uneven windows. World Wide Shades can help you choose—start at design your shade.