Deep window trim can make a roller-shade installation look either intentional or improvised. Thick casing, layered molding, and projecting sills change where brackets can sit and how far the fabric must travel. The shade may fit the glass but collide with the trim, leave a side gap, or sit visibly out of level. A good installation begins by measuring the trim as part of the window, not treating it as decoration that can be ignored.
World Wide Shades helps homeowners match a roller shade, cassette, bracket, and mount to the actual opening. Configure a shade in the World Wide Shades builder, order swatches to see how fabric relates to the casing, or contact World Wide Shades before drilling. If you are working with a tight reveal, send a straight-on photo and a side view so the clearance can be reviewed.
Why deep trim changes the installation
Window casing can project 1 1/2 inches, 2 1/4 inches, or more from the wall. A decorative sill may project farther at the bottom than the side casing, while a crown detail may create an uneven top surface. A roller shade mounted directly to the trim can sit too far forward, rub when lowered, or leave the fabric outside the glass plane.
Deep trim creates four common decisions: mount inside the recess, mount on the face of the casing, mount above the casing on the wall, or mount on the ceiling. Each position changes coverage, projection, bracket load, and the finished look. The how to install roller shades guide covers the basic sequence; this article focuses on trim-specific decisions.
Before installation, gather a drill, bits appropriate for wood or masonry, level, pencil, steel tape, stud finder, screwdriver, step stool, shims or spacers, and safety glasses. Use a second person for a wide shade. Never stand on a countertop or stack boxes to reach a high bracket.
Measure the trim and clear opening
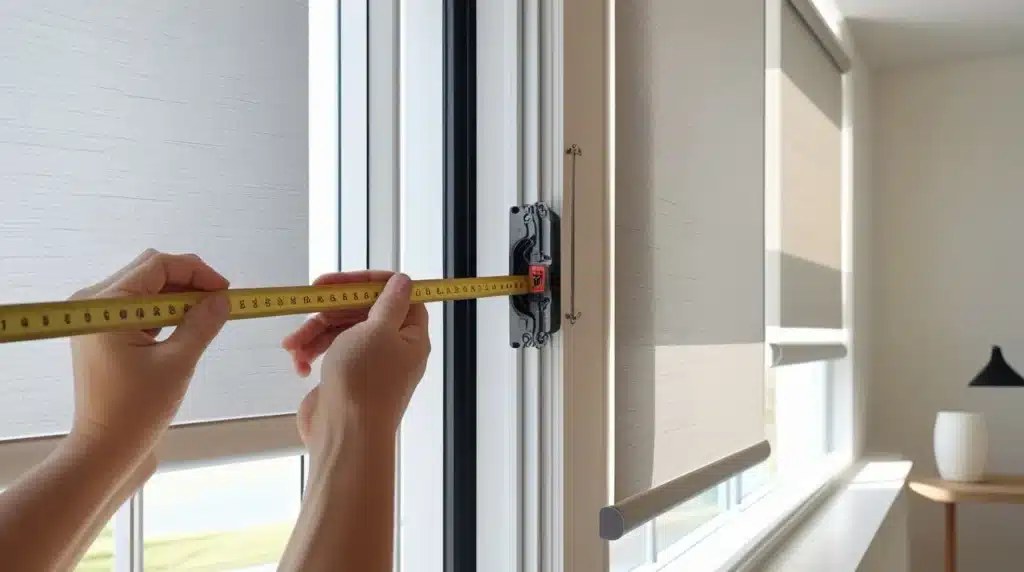
Measure the clear glass opening, the recess depth, the casing projection, and the flat surface where each bracket might sit. Take depth readings at the top, both sides, and the sill because older trim is rarely uniform. A recess that measures 3 inches at the top may narrow to 2 1/4 inches at the corners.
Measure the shade hardware, not only the fabric. A tube with brackets may need 2 inches of depth, while a cassette can require 3 inches or more. The fabric roll grows in diameter as the shade rises; a large shade can project farther than a small sample. Ask World Wide Shades for the selected system's bracket and cassette dimensions before you place the mount.
Check handle, latch, crank, insect-screen, and window-opening clearances. Mark any object that projects more than 1/2 inch into the shade path. If a casement swings inward, temporarily open it and confirm that the bracket and bottom rail will not block the sash. A 1-inch spacer can solve a small conflict, but it cannot compensate for a fundamentally undersized recess.
For inside mounts, measure width at the top, middle, and bottom and use the narrowest raw opening. For outside mounts, decide the finished coverage and measure the flat mounting area, including the overlap beyond the trim. Contact World Wide Shades with those numbers if the trim is layered or angled.
Choose the best mounting surface
An inside mount places the brackets in the recess. It keeps the trim visible and can look clean in a deep opening, but only if the hardware fits the shallowest point. Do not force brackets against a sloped or rounded molding. A shim or alternate bracket may be safer than bending the hardware.
Mounting on the face of the casing works when the trim is flat, solid, and wide enough to support the screws. Locate fasteners away from the thin decorative edge and into the structural portion of the casing. Pre-drill hardwood trim to reduce splitting. If the casing is hollow or only a thin overlay, use the wall framing or a rated anchor instead.
Mounting above the trim on the wall often provides the most consistent plane. Place the headrail 2 to 4 inches above the casing when possible, and extend the shade 2 to 3 inches beyond each side to reduce edge light. Verify that the wall has a stud or install an appropriate anchor for the shade weight. A wide motorized shade may need more support than a narrow manual shade.
Ceiling mounting can be useful when the casing reaches the ceiling or the wall above it is too narrow. Confirm the ceiling material and locate framing before drilling. The shade should hang parallel to the glass, not at an angle caused by an uneven ceiling.
The roller-shade valance options guide explains how a cassette changes the visual line above deep molding. Use the World Wide Shades builder to compare an exposed roll with a covered cassette before choosing the mounting plane.
Use spacers and shims correctly
Spacers move the bracket forward so the tube, fabric, and bottom rail clear trim. They are useful when the casing projects into the roll path or when a handle sits close to the glass. Use a spacer designed for the shade system or a solid, stable shim that bears evenly across the bracket.
Do not stack random washers, soft foam, or loose scraps behind a heavy bracket. Uneven support can twist the tube and cause the fabric to telescope, rub, or roll crooked. A spacer should be wide enough to support the whole bracket and fastened so it cannot rotate.
Shims correct a small surface irregularity. Place them behind the bracket and recheck the level across the full width. If one side requires more than about 1/4 inch of correction, reconsider the mounting surface or use a ledger board; excessive shimming can reduce screw engagement and make the installation unstable.
For a cassette, check the front clearance with the shade fully raised. The roll can be larger at the top than the hanging fabric suggests. For a reverse roll, confirm that the fabric moves away from the trim rather than toward it. Contact World Wide Shades if you need the bracket projection for a selected fabric and cassette.
Install brackets on a level line
Mark the bracket locations using the shade manufacturer's spacing instructions. Keep brackets far enough from the tube ends for the operating mechanism, but not so close to the trim that a screwdriver cannot reach. Hold the headrail or tube in place and mark both mounting holes before drilling.
Use a level across the marks. Do not assume the trim is level; decorative casing can be intentionally sloped. A shade follows the bracket line, so a 1/8-inch error across a 60-inch opening can be visible and can make the fabric favor one side.
Drill pilot holes sized for the fastener. In wood, the pilot should clear the screw's body while retaining thread in the framing. In drywall, use a suitable anchor or locate a stud. In masonry, use a masonry bit and fastener rated for the substrate. A bracket should not be supported only by a thin finish layer.
Drive the screws until the bracket is secure, but do not crush plastic or deform a metal bracket. Install the second bracket, then recheck level before hanging the shade. For wide shades or motorized units, follow the required support count; adding a center support where the system allows it can prevent tube deflection.
Hang the shade and check trim clearance
Seat the control-side mechanism first, then the opposite end, following the hardware instructions. Keep fingers away from the spring-loaded or motorized components. Confirm that the tube is fully engaged and that the cassette cover, if used, snaps into its supports without bowing.
Lower the shade slowly. Watch both edges for contact with trim, a handle, or the sill. The fabric should hang parallel to the window and the bottom rail should not hit the sill. Raise it halfway and lower it again to check for rubbing. If the shade rolls toward one side, stop and recheck bracket level, tube seating, and side clearance rather than forcing the fabric.
Test the window itself. Open and close the sash, if applicable, and confirm the handle has room. Check that curtains, shutters, or a window seat do not collide with the bottom rail. For a deep sill, measure the front-to-back clearance with the shade at its lowest position.
Order swatches from World Wide Shades if you are still deciding between a fabric that highlights the trim and one that blends with it. The window shades color guide can help when the casing is a strong contrasting color.
Finish the installation cleanly
Remove pencil marks with an appropriate cleaner for the trim finish. Do not use oily polish near the fabric. If a gap remains at the top because of a deep sill or layered molding, use a compatible fascia or valance rather than stuffing the opening with caulk or foam.
For outside mounts, confirm that the side overlap is even. An overlap of 2 to 3 inches per side is common, but a bay, adjacent door, or return wall may limit it. For blackout applications, remember that a shade can still show light at the side edges; the blackout light-gap guide explains when channels or an alternate mount are worthwhile.
Motorized shades should be tested through every stop position. Keep the remote or wall control accessible, and document the charger location. A rechargeable motor often needs its first charge before programming. Review the smart-home motorized shades setup guide if the shade will join a hub or voice assistant.
Start a custom trim-friendly configuration or contact World Wide Shades for help with a difficult casing. Call (844) 674-2716 if the shade rubs after leveling or if the mounting surface will not hold the recommended fasteners. Call (844) 674-2716 before remounting a heavy shade on uncertain trim.
FAQ
Yes, if the casing is flat and structurally sound, but the bracket must be positioned so the tube, roll, and bottom rail clear the trim. A spacer, outside mount, or wall mount may be better than fastening directly to a decorative edge.
The exact amount depends on the tube, cassette, fabric thickness, and operating hardware. Measure the selected system rather than relying on a generic number. Leave enough room for the fully rolled shade and check handles and sills through the full travel.
Inside mounting preserves the casing when the recess is deep and uniform. Mount above the trim when the recess is too shallow, irregular, or obstructed. A face mount can work on flat structural casing. World Wide Shades can compare the options from a photo and depth measurement.
Avoid loose or uneven washers behind a heavy bracket. Use a purpose-made spacer or a solid shim that supports the full bracket and does not rotate. The bracket must remain level and the fasteners must retain adequate engagement in the structure.
Common causes include brackets that are not level, a tube that is not fully seated, insufficient side clearance, or a surface that is out of square. Stop operating the shade, remove tension, and recheck the bracket line and opening dimensions before adjusting the fabric.
Make deep trim part of the design
Deep casing is not a reason to avoid roller shades; it is a reason to plan the mounting plane carefully. Measure the clear opening and every projection, choose the bracket surface, use solid spacers when needed, install on a level line, and test the shade with the window operating. The finished result should look as if the trim and shade were designed together.
Build your trim-friendly shade, request fabric swatches, or contact World Wide Shades with your photos and measurements. World Wide Shades can help you select a clean cassette, reliable mount, and operating method that respects the character of the window.