Why roller-shade fabric edges start to fray
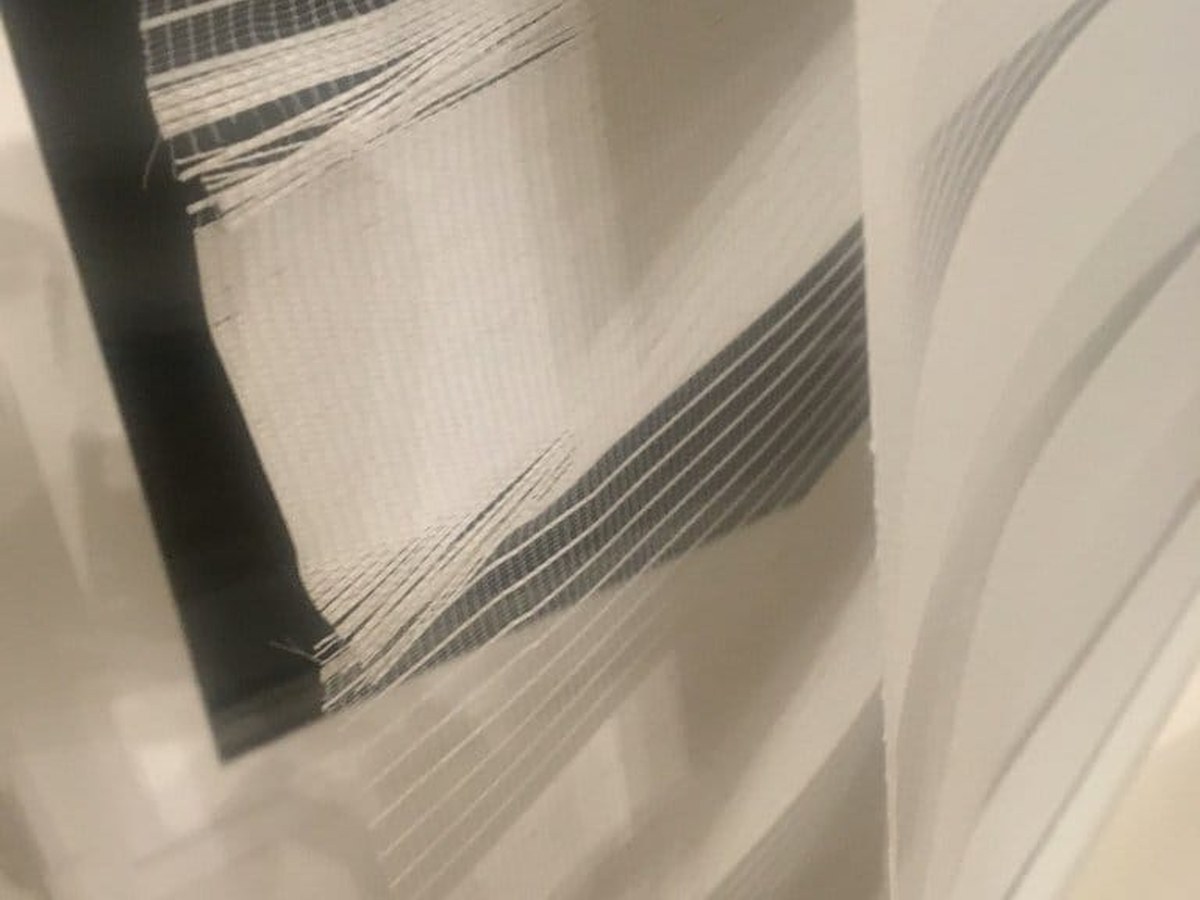
A frayed edge is more than a cosmetic flaw. Loose fibers can snag as the shade rolls, the edge can begin to curl, and the fabric may start tracking unevenly across the tube. The first step is to locate the cause: rubbing against trim, contact with a handle or screw, a cut edge that was never finished correctly, harsh cleaning, or ordinary wear after years of use.
Many roller fabrics are coated or engineered screen materials rather than ordinary drapery cloth. They may contain polyester, fiberglass, PVC, or a combination, and their edges respond differently to heat, abrasion, water, and scissors. A repair method that is acceptable for one textile may damage another. World Wide Shades recommends identifying the fabric collection or checking the care label before touching a worn edge.
If the fabric is catching during operation, stop raising and lowering it until you find the point of contact. That pause can prevent a small nick from spreading across the full height of the shade. For advice on whether the damage is repairable, send a close photo through World Wide Shades contact.
Inspect the damage without making it worse
Lower the shade only far enough to expose the damaged section. Use good light and examine both edges from top to bottom. Note whether the material is unraveling, separating into a coating and base cloth, or simply showing a fuzzy line. A cut edge usually appears straight; abrasion often creates a repeated rough patch at the same height or location as nearby hardware.
Check the window side as well as the room side. A fabric edge can rub against a crank, latch, mounting screw, tile return, or projecting trim that is hidden from the front. Look for matching scrape marks on the hardware. Also inspect the bottom hem bar and the headrail for sharp burrs or an end cap that sits too close to the fabric.
Photograph the whole shade, the damaged edge, and the bracket or window feature nearest it. Include a ruler or tape measure in one detail photo so the distance from the edge to the snag is clear. World Wide Shades can use that information to distinguish a fabric defect from an installation or clearance issue before recommending replacement.
If a new shade arrives with a visibly fuzzy or irregular edge, take photos before installation and contact the seller. Keep the packaging and product label. Do not trim the fabric or apply sealant while a warranty or quality review may be needed.
Gradual wear points more often to repeated friction, a cleaning method that roughened the surface, or an operating path that pulls the fabric off square. A shade that has worked for years can begin to fray after a new handle, replacement window, or hardware change moves into its path. The shade itself may be fine; correcting the interference can protect a replacement.
Common causes and practical prevention
This is among the most common patterns. The fabric may brush a window crank, uneven jamb, screw head, or side channel every time it moves. Lower the shade slowly and see whether the edge touches a fixed point. If it does, do not pull the fabric away by hand while the roller is moving. Check whether the shade is correctly centered and whether a different mount or bracket projection would create clearance.
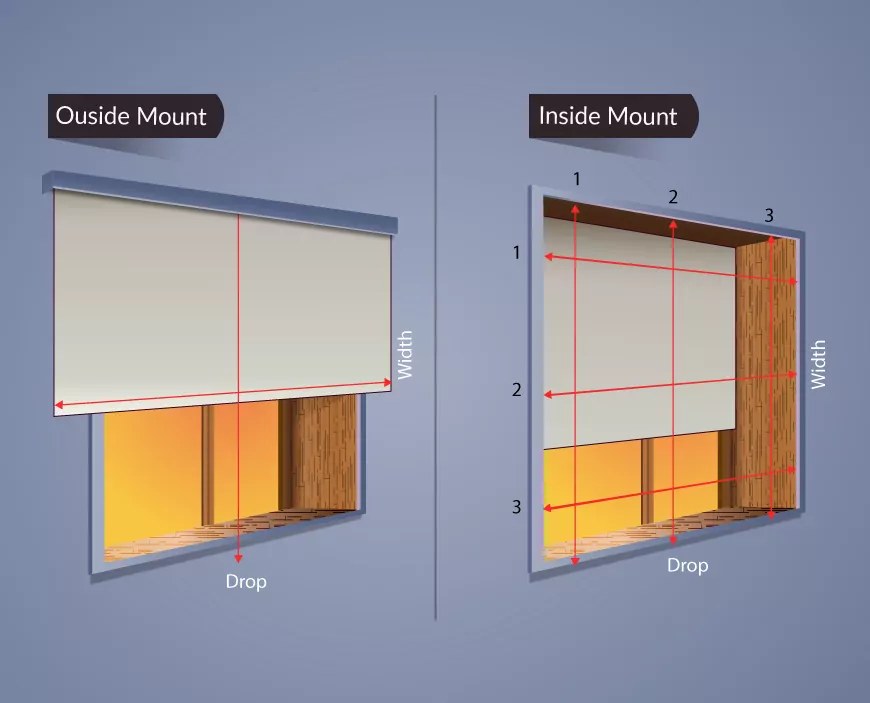
An inside mount has less room to forgive a projecting handle or tapered frame. Measure clearances at the top and bottom, then compare them with the product drawing. Our shallow inside-mount guide explains why minimum installation depth and actual operating clearance are different questions. World Wide Shades can help review the geometry through the shade builder or with a photo and dimensions.
When fabric rolls toward one side, one edge can rub harder than the other. A headrail that is not level, a loose bracket, or an out-of-square fabric panel may cause the shade to track sideways. Pause operation if the roll bunches, then use our roller-shade alignment checks before deciding the fabric is defective.
Home trimming can leave an edge that unravels or exposes a backing layer. Some fabrics are cut and sealed using a controlled process; others rely on woven construction or a hem. A household heat source or open flame is never a safe substitute for factory edge finishing. Heat can melt a coating, distort a screen, create fumes, or start a fire.
If the width is wrong, ask the manufacturer whether the specific model can be resized. The answer depends on the material, tube, motor, and edge finish. The roller-shade fabric guide compares common material categories, and openness factor explains how screen weave choices affect visibility and glare.
Dry dust with a soft duster or use a clean vacuum brush on low suction if the fabric instructions allow it. Press lightly; a stiff brush or strong suction can pull at an already weak edge. If spot cleaning is permitted, use the manufacturer’s specified method and a clean, soft cloth. Test first in an inconspicuous area, work gently, and let the fabric dry as directed.
Care varies by product. Lutron’s treatment-care document recommends light dusting and gentle cleaning methods for applicable shade fabrics and cautions against hard rubbing; Norman states that its roller fabrics should not be steamed, while selected exceptions are specified by collection. Read the exact care guide instead of assuming steam, water, or detergent is safe (Lutron care and maintenance guide; Norman roller shade product care).
What not to do to a frayed edge
Do not cut loose threads while the shade hangs in the window. A clipped fiber can create a longer run, and a pair of scissors can nick the adjacent fabric. Avoid clear nail polish, household glue, adhesive tape, iron-on hem tape, or hot tools unless the shade maker approves that exact material and repair. Products that harden or leave residue can prevent the shade from rolling flat.
Do not pull on a loose strand. A single pulled thread can unravel across the edge, especially with woven or knitted constructions. If a strand hangs into the roll, stop operating the shade and ask the manufacturer or a qualified repair service how to secure it.
Do not keep cycling a fabric panel that is already folded into the tube. Each additional wrap may set a crease or push the damaged edge farther under the roll. World Wide Shades can help assess whether only the panel, or the entire operating assembly, needs attention. Call (844) 674-2716 or request help online.
Repair versus fabric or full-shade replacement
A repair may be possible when the fabric is still straight, the damaged area is small, and the manufacturer offers a compatible edge service or replacement panel. Ask whether the shade must be returned to a service center and whether the fabric collection is still available. A replacement panel may not match an older shade exactly because dye lots, surface finishes, and production runs change.
Replacing the complete shade may be practical when the panel is badly worn, the edge has multiple runs, the tube is bent, or the operating mechanism is also failing. It can also resolve a layout problem: a different width, an outside mount, or a smaller headrail may stop the recurring rub. Compare the cost of service, shipping, and replacement rather than judging by fabric price alone.
For a replacement, record the finished shade width, drop, mount type, fabric openness, control side, and any motor or valance details. Take measurements according to the supplier’s process; do not reuse an old order size without checking the opening. World Wide Shades offers free fabric swatches so you can compare a new screen or light-filtering material against the room before placing an order. If the damaged shade is in a kitchen or bath, our kitchen and bathroom shade guide discusses moisture, ventilation, and cleaning considerations.
Reduce the chance of repeat damage
After a repair or replacement, operate the shade through a short test before using its full travel. Check both side edges as the fabric moves. If the shade is motorized, confirm that its limits stop the fabric before it strikes the sill or valance. Keep window handles in the same position used during normal operation, and remove objects from the sill that could catch the bottom rail.
During seasonal cleaning, inspect the edges for new fuzz, a shiny rub line, or a spot where the coating is lifting. Small changes are easier to address when they are found before the shade is tightly wound around the tube. If fabric begins to drift as well as fray, follow the uneven-roll diagnosis and pause operation if it bunches.
World Wide Shades can help you compare repair options, replacement fabrics, and shade profiles that avoid the original contact point. Explore the custom shade builder, request guidance through contact, or call (844) 674-2716. A precise fit review is more useful than a quick edge patch when the underlying cause is a tight clearance.
Frequently asked questions
Do not cut it while the shade is installed or without the maker’s instructions. Trimming can expose an unfinished textile, remove a coating, or make the edge unravel further. Ask whether the exact fabric can be professionally resized or repaired.
One-sided damage often points to rubbing against a handle, screw, trim edge, or uneven frame, or to a shade that is not rolling squarely. Look for a matching contact mark and check whether the fabric drifts toward that side.
No. Uncontrolled heat can melt fabric coatings, damage the shade, create fumes, or ignite surrounding materials. Do not use flames or household heat tools as an edge-finishing method.
Only if the specific manufacturer lists steaming as acceptable for that fabric. Some roller materials should not be steamed, and product care rules vary by collection. Check the care guide before applying heat or moisture.
Sometimes. Availability depends on the shade construction, collection, age, width, and manufacturer service options. A matching replacement may vary in color from the original, so compare a current swatch in the room.
Stop if the edge catches, the fabric bunches, a loose strand winds into the roll, or the bottom bar binds. Continued cycling can create a crease or extend the damaged area.